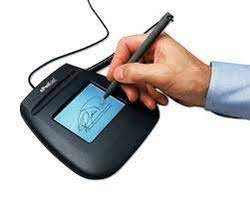
Signature scanning is the most convenient way to sign digital documents if you do it frequently. A scanned digital signature is a handwritten signature that has been scanned and converted into an electronic representation, such as a PDF.
The image may then be saved and readily included in electronic documents. You make the scanned digital signature once and then use it to sign contracts and other documents over and over again.
Using a scanned digital signature to complete the document signing procedure is a faster and more efficient option. It also guarantees that each signature is safe and follows all applicable electronic signature regulations.
Signature Scanning: Six Steps to follow
1. Sign In
The first step is to simply handwrite your signature on a sheet of paper. Because the digital format will most certainly decrease, it’s a good idea to make the signature larger than usual. It’s also a good idea to make numerous signatures so that you have a variety to choose from.
2. Scanning the file
You can scan the document once you’ve signed the sheet of paper. The document resolution, or DPI, is something you’ll want to pay attention to.
Scanned photographs with a higher DPI will appear more realistic, thus a DPI of 600 or higher is recommended. You should always strive for too many pixels rather than too few because this will help to retain the image’s quality.
3. Cut the picture in half.
You’ll want to crop the image once you’ve scanned the signature and picked the one you think looks best.
It’s also possible that you’ll have to tweak and reposition the signature to make it level on a horizontal signature line.
4. Copy the image and paste it into a new document.
You may save the cropped image of your signature in a new document with a transparent backdrop once you’ve cropped it. To erase any remaining white in the document, use a magic wand to edit the picture file.
5. Save the image as a PNG file.
The next step is to save the file as a PNG. The signature may be readily submitted into most digital signature applications if it is stored as a PNG. Transparency is supported by PNG files, making them ideal for text and illustrations. It will also protect the image’s quality better than JPG files.
6. Sign contracts and documents with your signature.
Now that you’ve saved the scanned digital signature, you may use it to add it to contracts and other documents whenever you like. This will make it easier for you to sign paperwork and finalize business.
For a more personal touch, some people choose to include their scanned digital signature in their email signature. Simply send a few test emails to ensure that everything is working properly.
Signature scanning, is it valid?
One technique to speed up the document signing process is to create a scanned digital signature. You just have to generate the scanned signature once, and then you may use it on contracts and proposals again and again.
However, if you’re unfamiliar with electronic signatures, you could be wondering whether a scanned digital signature is legitimate to utilize. On contracts and other electronic documents, scanned digital signatures are permitted.
You should, however, take the appropriate steps to prevent being a victim of fraud. When a signed document is changed after your scanned signature is recorded, fraud might occur. You must be able to demonstrate that the other party altered the contract after it was signed.
Bottomline
It’s critical to use the best e-Signature software available. Anti-fraud technology will be included in electronic signature software, creating an audit trail so you can determine whether a document has been tampered with. Always remember that establishing a signature Scanning is just one step in the document signing process.
Read Also: Can USB Ports Go Bad?