The apparel industry has experienced a massive paradigm shift over the past decade. The days when starting a clothing brand meant ordering thousands of pre-printed shirts and storing them in a garage are rapidly fading. Today, agility, customization, and sustainability are the keys to success, and at the heart of this revolution is the Direct to Garment Printer. The Interesting Info about dtg printer.
If you are looking to start a custom clothing business, scale an existing print shop, or transition into the highly profitable world of print on demand, investing in a high-quality DTG printing setup is one of the most important decisions you will make. However, the market is flooded with options ranging from converted desktop printers to massive, industrial-grade machines.
Choosing the right Direct to Garment Printer requires a deep understanding of the technology, your specific business needs, the daily operational requirements, and the true costs involved. This comprehensive guide will walk you through every single detail you need to know to make an informed, profitable investment.
1. Understanding Direct to Garment Technology
Before you can choose the best machine for your business, you need to understand exactly how the technology works. Direct to garment (DTG) printing is essentially a highly specialized inkjet printing process designed specifically for textiles.
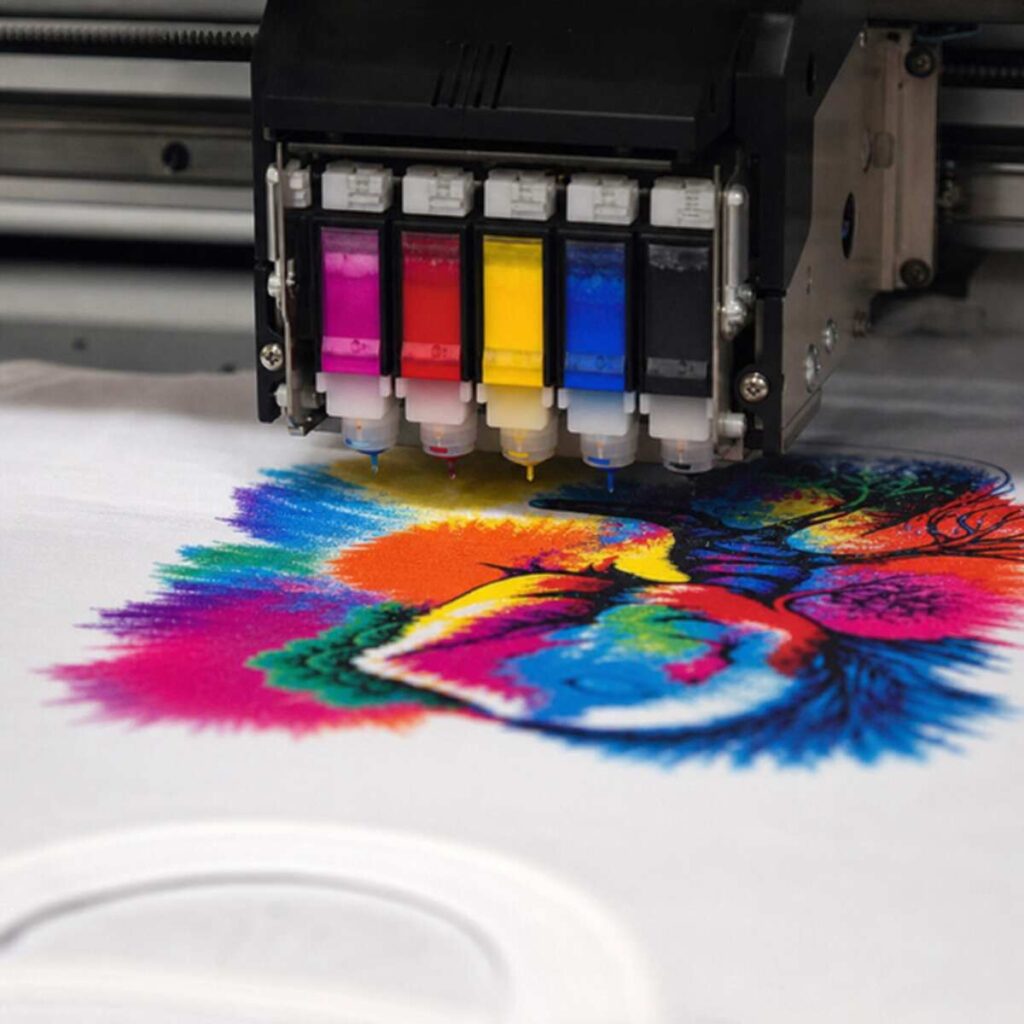
Instead of printing on a flat sheet of paper, a Direct to Garment Printer utilizes specialized platens to hold a piece of apparel perfectly flat while a print head passes over it, depositing microscopic droplets of ink directly into the fibers of the fabric.
The Magic of Piezoelectric Print Heads
The core component of any commercial DTG machine is the print head. Modern high-end machines utilize piezoelectric print head technology in textile systems. Unlike thermal print heads (which use heat to create a bubble that forces ink out), piezoelectric heads use an electrical charge to alter the shape of a tiny crystal inside the nozzle.
When the crystal deforms, it acts like a microscopic plunger, forcing a highly precise droplet of ink out of the nozzle and onto the shirt. This technology allows for incredible control over droplet size, ensuring sharp details, smooth gradients, and minimal ink waste. Because it does not rely on heat, it is also highly compatible with the complex chemical makeup of textile pigment inks.
Why Businesses are Adopting DTG Printing
The rise of the internet has completely changed consumer behavior. Customers now expect personalized products, unique designs, and fast shipping. The benefits of print-on-demand fulfillment for clothing brands are impossible to ignore. By utilizing a DTG printer, you can offer an unlimited number of designs on your website without holding a single printed shirt in stock. You only print a garment when a customer has already paid for it, drastically improving cash flow, eliminating dead stock, and reducing warehousing costs.
2. Comparing Printing Technologies: Is DTG Right for You?
While DTG printing is incredible, it is not the only way to decorate a shirt. To know if a Direct to Garment Printer is the right choice for your specific business model, you must compare it to the alternatives.
DTG vs. Screen Printing
Screen printing is the traditional heavyweight champion of the apparel industry. It involves burning a design into a mesh screen and using a squeegee to push thick ink onto the garment.
When evaluating DTG vs screen printing for low volume production, the differences become stark. Screen printing requires a massive amount of setup time. You have to separate the artwork by color, output films, coat screens with emulsion, expose them, wash them out, tape them, and register them on the press. Because of this high setup cost, screen printing is only cost-effective when you are printing dozens or hundreds of the exact same design.
DTG printing, on the other hand, has virtually zero setup time. You load the digital file, load the shirt, and press print. If a customer wants one shirt with a highly detailed, full-color photograph, DTG is the only economically viable way to produce it. However, if a customer wants 5,000 shirts with a simple one-color logo, screen printing will be significantly faster and cheaper per unit.
Inks: Feel, Durability, and Chemistry
Another major difference lies in the inks. When choosing between aqueous pigment inks and plastisol, you are choosing between entirely different physical finishes. Plastisol (the standard screen printing ink) is a PVC-based plastic. It sits entirely on top of the fabric, creating a thick, rubbery layer (often called the “hand”).
DTG utilizes water-based (aqueous) pigment inks. These inks physically bond with the natural fibers of the garment. The result is a highly breathable print with an incredibly soft hand feel. Modern DTG inks have evolved significantly; textile pigment ink durability and washability are now excellent, rivaling traditional methods, provided the garment is pretreated and cured correctly.
DTG vs. Direct to Film (DTF)
A newer technology disrupting the market is Direct to Film (DTF). When looking at direct to film vs digital textile printing (DTG), the processes are distinct. DTF involves printing the digital design onto a special PET film, covering the wet ink with a powdered adhesive, melting the adhesive, and then heat-pressing the film onto a shirt.
- Pros of DTG: Superior soft hand feel, faster for single custom shirts (fewer physical steps per one-off shirt), exceptional breathability.
- Pros of DTF: Can be applied to almost any fabric (cotton, polyester, nylon) without the need for liquid pretreatment, generally cheaper equipment costs.
- The Verdict: If your primary focus is premium retail-quality 100% cotton or high-cotton blend t-shirts with an ultra-soft feel, DTG remains the gold standard. If you want to print heavily on synthetic performance wear, backpacks, or hats, DTF might be a better supplementary technology.
3. Key Features to Look For in a Direct to Garment Printer
If you have determined that DTG printing fits your business model, you are now faced with comparing machine specifications. Here is what you need to evaluate.
Print Quality and Resolution
Not all digital prints are created equal. When asking what is the best resolution for digital fabric imaging, the answer depends on the artwork. Most commercial DTG printers offer variable resolutions, commonly ranging from 600 x 600 DPI (Dots Per Inch) up to 1440 x 1440 DPI or even 1200 x 2400 DPI.
While higher DPI yields photographic realism and smoother gradients, it also prints much slower and uses slightly more ink. A machine that allows you to easily toggle between a high-speed “production mode” (e.g., 720 x 720 DPI) for simple vector graphics and a “high-quality mode” (e.g., 1440 x 1440 DPI) for complex photographs is ideal.
Speed and Throughput
Printer speed is usually advertised in “shirts per hour.” Be very skeptical of manufacturer speed claims, as they are often based on ideal conditions—printing a small graphic on a light-colored shirt at the lowest resolution setting.
When printing on dark shirts, the printer must first lay down a layer of white ink, and then print the CMYK colors over it. This drastically reduces the speed. Look for machines that feature a “single-pass” or “inline” printing mode, where the print head lays down the white underbase and the color layer simultaneously in a single pass of the gantry, saving precious seconds per shirt.
Software Integration
A printer is only as good as the software telling it what to do. You will need dedicated software to translate your digital artwork into data the printer can understand. This is where you must look closely at RIP software for color management and accuracy.
RIP (Raster Image Processor) software does the heavy lifting. A high-quality RIP will read the ICC color profiles of your design and perfectly translate them to the specific ink set of your printer, ensuring that the fire-engine red on your computer screen doesn’t print as a muddy orange. Furthermore, advanced RIP software can auto-generate white underbases, calculate precise ink costs per design, and handle variable data (like printing 15 different names on the back of 15 identical team shirts automatically).
4. The Economics: Budgeting, ROI, and Cost Analysis
Buying a Direct to Garment Printer is a significant capital investment. You are not just buying a printer; you are outfitting an entire production line.
The Initial Investment Ecosystem
To run a successful DTG operation, your shopping list will include:
- The DTG Printer itself.
- A pretreatment machine (automatic sprayers are highly recommended over manual hand-spraying for consistency).
- High-quality industrial heat presses (you will typically need two: one for drying pretreatment, one for curing final ink).
- Initial supplies (Inks, pretreatment fluid, cleaning solutions).
- Environmental controls (humidifiers and hygrometers).
Operating Expenses
Understanding your margins is critical. You must become an expert at calculating cost per print for apparel businesses.
Your cost per print is not just the cost of ink. The formula looks like this: (Cost of Blank Garment) + (Cost of Pretreatment Fluid) + (Cost of White Ink) + (Cost of CMYK Ink) + (Labor/Time Cost) + (Overhead/Electricity/Maintenance) = Total Cost of Goods Sold (COGS).
For example, printing an 8×10 inch full-color graphic on a black shirt might break down as:
- Blank Premium Cotton Shirt: $3.50
- Pretreatment Fluid: $0.35
- White Ink Underbase: $1.10
- CMYK Color Ink: $0.45
- Total Consumable Cost: $5.40
If you sell that custom shirt for $25.00, your gross profit margin is incredibly healthy, allowing plenty of room to absorb labor and overhead costs. However, printing large 14×16 inch blocks of solid white will significantly increase your ink costs. Quality RIP software will calculate this down to the penny before you even press print, allowing you to price your products accurately.
5. Mastering the DTG Workflow: Pretreatment and Curing
Buying the best Direct to Garment Printer in the world will not save you if your pre-press and post-press techniques are flawed. The biggest learning curve in DTG printing is fabric chemistry.
The Art of Pretreatment
Pretreatment is the secret foundation of a good digital print. When printing on dark garments, you have to use white ink. If you print water-based white ink directly onto a dry cotton shirt, the fabric will act like a sponge, absorbing the ink and resulting in a dull, faded, invisible mess.
Learning how to pretreat cotton shirts for printing is vital. Pretreatment is a liquid primer, usually consisting of a salt-based solution. When the white ink hits the pretreated surface, a chemical reaction occurs instantly. The salts in the pretreatment cause the white ink to flash-coagulate (gel up) on the absolute surface of the fabric fibers. This prevents the ink from soaking in, creating a smooth, bright white canvas for the CMYK colors to sit on.
Best Practices for Pretreatment:
- Application: Use an automatic pretreat machine. It sprays an even, calculated amount of fluid across the garment. Too little pretreat, and your print washes out. Too much, and the shirt becomes stiff, stains, or causes the ink to flake off in the wash.
- Drying: The pretreatment must be completely dried before printing. Use a heat press with a Teflon sheet.
- Matting the Fibers: The pressure from the heat press serves a dual purpose: it dries the fluid and presses the microscopic cotton fibers completely flat, preventing “fibrillation” (where tiny fibers poke through the ink, making the print look fuzzy).
Conquering Difficult Fabrics
Standard 100% ring-spun cotton is the best friend of any DTG printer. But fashion dictates variety. You will inevitably be asked to print on blends.
Printing on dark polyester blends and 50/50 fabrics is notoriously difficult due to a phenomenon called “dye migration.” When you heat-press a dark polyester shirt to cure the ink, the heat causes the synthetic dyes in the fabric to turn into a gas. This colored gas rises up and permanently tints your wet white ink (e.g., your bright white logo on a red poly-blend shirt turns completely pink).
To succeed with blends, you must adapt your workflow:
- Use a pretreatment solution formulated specifically for polyester.
- Look for DTG inks that have “low-cure” properties.
- Increase the amount of white ink laid down to act as a blocker.
- Cure the garments at a lower temperature for a longer period of time to avoid pushing the polyester dyes past their sublimation threshold (usually around 300°F – 320°F).
Curing the Final Print
Once the printer finishes its job, the ink is still wet. It must be cured so that the water evaporates and the pigment binders cross-link with the fabric fibers. Knowing the exact industrial heat press settings for curing ink guarantees longevity.
For standard water-based DTG inks on cotton, the typical curing requirement is hovering the heat press slightly above the wet ink for 10-15 seconds to let steam escape, followed by pressing the shirt at 330°F to 340°F (165°C – 170°C) for 90 to 120 seconds with light to medium pressure. Always protect the print with a sheet of parchment paper. The exact settings vary by ink manufacturer, so always test and wash your garments before selling them to the public.
6. Daily Operations, Maintenance, and Troubleshooting
If there is one absolute truth in the DTG industry, it is this: A neglected printer is a broken printer.
Digital textile printing relies on moving liquid pigment through microscopic nozzles. White ink, in particular, is highly problematic because the pigment used to achieve opacity is titanium dioxide. Titanium dioxide is a heavy metal. If left sitting, it behaves like sand in a glass of water—it sinks to the bottom, clumps together, and solidifies.
The Battle Against Clogs
Preventing clogged print heads in inkjet machinery is the daily focus of every DTG operator. The most important tool you have against clogs is not a cleaning solution, but a hygrometer.
DTG printers require a strictly controlled environment. The air in your print room must be kept at a relative humidity between 45% and 60%, with a stable temperature around 70°F (21°C). If the air is too dry, the water in the ink sitting at the tip of the print head will evaporate rapidly, causing the ink to dry and permanently plug the microscopic nozzle. Invest in commercial humidifiers if you live in a dry climate.
Furthermore, keep your machine powered on. Modern commercial Direct to Garment Printers feature internal circulation systems (WIMS – White Ink Management System) that periodically pump the white ink through the lines, dampers, and filters even when the machine is idle, preventing the heavy pigments from settling.
Your Daily Routine
To keep your machine making money, you must institute rigid standard operating procedures. Implement the following daily maintenance checklist for professional apparel equipment:
Start of the Day:
- Agitate your ink cartridges/tanks (gently shake white ink for 30 seconds to mix).
- Check room humidity and temperature.
- Perform a small head cleaning cycle.
- Print a “Nozzle Check” pattern on a piece of clear film or paper. Examine it closely to ensure 100% of the tiny lines are printing perfectly. If there are gaps, perform another clean. Never start printing customer orders with missing nozzles.
End of the Day:
- Clean the Wiper Blade: This rubber blade squeegees the bottom of the print head. If it is caked with dried ink, it will smear debris into the nozzles instead of cleaning them. Use specialized cleaning swabs and fluid.
- Clean the Capping Station: This is the rubber pad where the print head parks at night. It creates an airtight seal to prevent the head from drying out. Clean the edges of this rubber seal meticulously.
- Wipe down the encoder strip (carefully, depending on manufacturer instructions).
- Leave the main power switch ON so the auto-circulation features remain active overnight.
Troubleshooting Print Defects
Even with perfect maintenance, issues will occasionally arise. The most common complaint from operators is horizontal lines appearing across solid blocks of color.
When troubleshooting common banding issues in digital prints, follow this diagnostic process:
- Check for Clogged Nozzles: Run a nozzle check. If nozzles are missing, the printer is leaving physical gaps of unprinted space with every pass. Clean the head.
- Examine the Print Head Height: If the platen is adjusted too low, the print head is firing ink from too far away. The microscopic droplets disperse into a mist before hitting the shirt, causing blurry lines and banding. Adjust the platen so the shirt is as close to the print head as safely possible without physically rubbing it.
- Clean the Encoder Strip: The encoder strip is a clear plastic band running behind the print head with thousands of microscopic lines printed on it. An optical sensor reads these lines to know exactly where the head is. If ink mist or grease gets on this strip, the sensor gets “blinded,” causing the head to stutter or fire at the wrong time, leading to severe banding or double-printing.
- Check Bi-Directional Calibration: Over time, mechanical belts stretch. If your printer fires ink while moving left, and then fires again while moving right, those droplets must align perfectly. If they do not, you will see banding. Run your printer’s automated bi-directional feed alignment test via the maintenance menu.
7. Scaling Your Business with DTG
Once you have mastered the operation, maintenance, and economics of your Direct to Garment Printer, the focus shifts to scaling. DTG equipment is highly modular, meaning you do not necessarily need to buy a massive $250,000 industrial machine right away. Many successful print shops build “pods.”
Building a Production Pod
A single operator can comfortably run a dual-platen DTG printer, one automatic pretreat machine, and two heat presses in a tight, efficient horseshoe-shaped workspace. Once this pod reaches maximum daily capacity, instead of upgrading to a completely different, unproven technology, you simply purchase a second identical pod and hire a second operator. This minimizes training time and ensures redundancy—if one printer goes down for maintenance, your shop does not grind to a halt.
Integrating the Tech Stack
To truly maximize the benefits of print-on-demand fulfillment for clothing brands, you must connect your hardware to the internet.
The ultimate goal of a modern DTG facility is a touchless workflow. This means integrating your e-commerce store (like Shopify or WooCommerce) directly with your printer’s software. When a customer orders a shirt online, the system automatically routes the artwork to the RIP software, generates a barcode, and places it in a digital queue.
The operator simply scans a blank shirt, loads it onto the platen, and the software automatically pulls the correct artwork, color profile, and underbase settings without the operator ever touching a mouse. This drastically reduces human error, speeds up production, and allows a small team to output hundreds of custom, one-off garments per day profitably.
Conclusion
Choosing the right Direct to Garment Printer is about much more than just picking a brand name or looking at a price tag. It is about deeply analyzing your specific business needs, the types of garments your customers demand, and your capacity to manage highly sophisticated digital equipment.
By understanding the mechanics of piezoelectric print head technology in textile systems, implementing a rigorous daily maintenance checklist for professional apparel equipment, and mastering the chemistry of how to pretreat cotton shirts for printing, you remove the guesswork from digital apparel decoration.
Whether you are debating DTG vs screen printing for low volume production, evaluating the benefits of print-on-demand fulfillment for clothing brands, or diving deep into calculating cost per print for apparel businesses, remember that knowledge is your ultimate competitive advantage.
A Direct to Garment Printer is a powerful engine for creativity and profit. Pair the right machinery with excellent software, strict environmental controls, and high-quality blanks, and you will be well on your way to building a scalable, agile, and highly successful modern apparel business. Take your time, request physical print samples, calculate your ROI carefully, and embrace the digital revolution of clothing decoration.