


We’ve all stared down that little notification bubble on our screens and clicked “Remind Me Tomorrow” just to get it out of the way. While ignoring a Mac software update may seem like saving time, industry data reveals a hidden danger: roughly 85% of cyberattacks specifically target unpatched software. Think of your computer like your home; installing these updates is exactly like changing the batteries in your smoke detector. It might seem like a minor chore when you are trying to work, but it acts as your absolute first line of defense against digital intruders. Obtain the Best information about Best macOS Apps 2026.
macOS—the main operating system that makes your computer actually run—acts as the core foundation of your digital house. Occasionally, Apple releases what they call a patch, which is simply a targeted repair for a specific weak spot in that foundation. For example, cybersecurity researchers recently discovered “BlastPass,” a sneaky type of threat known as a zero-day vulnerability. This scary-sounding term just means an invisible flaw that criminals found before the software creators did, but installing the latest patch instantly sealed the crack and protected everyday users from harm.
Because of these hidden threats, solid Mac security relies on understanding the difference between the two main types of downloads your computer asks for. Feature updates are the fun renovations that give you new tools or fresh emojis, while security patches are the urgent lock replacements that keep your personal data safe. Surprisingly, letting your computer install these essential repairs doesn’t just pile more files onto your hard drive. In practice, the update process routinely cleans out old, unnecessary temporary files, helping you automatically reclaim storage space in the background.
Beyond keeping your information safe, a proper software tune-up often provides a noticeable performance boost for a machine that feels slower than the day you unboxed it. You do not need to be a computer expert to take control of these routine maintenance tasks and keep your device healthy. With just a few straightforward clicks, you can clear away those annoying notification badges forever and ensure your Mac runs at its best. Managing these downloads without interrupting your busy day requires just a few straightforward steps.
Finding Your Mac’s Identity: How to Check Your Version and Model
Before trying to install the macOS latest version, you need to know exactly what kind of machine you have on your desk. Identifying your Mac’s specific details helps you understand which updates it can handle. Every Mac has a built-in digital ID card called “About This Mac” that tells you its name, its age, and the “engine” running inside it. Checking this dashboard takes only a few seconds, but it provides the foundational knowledge you need to keep your system running safely and efficiently.
Finding this information is straightforward, and it is the first step in checking macos version compatibility—which simply means figuring out if your computer is allowed to install the newest software available. Apple names its major operating systems after places in California, like Sonoma, Ventura, or Monterey. Here is how to locate yours:
- Click the apple menu (the small apple logo) in the very top-left corner of your screen.
- Select “About This Mac” from the drop-down list.
- Look at the large text at the top of the pop-up window to see your current macOS name and number.
Right below that software name in the same window, you will see a line labeled either “Chip” or “Processor.” This tells you what kind of brain your computer uses to process information. Older Macs use “Intel” processors, while newer ones use Apple’s own chips, usually labeled as M1, M2, or M3. Knowing whether you have an Intel or an M-series Mac is helpful because it dictates which future updates your machine can support. Now that you know exactly what kind of Mac you own and the software it is currently running, you are ready to start gathering those updates.
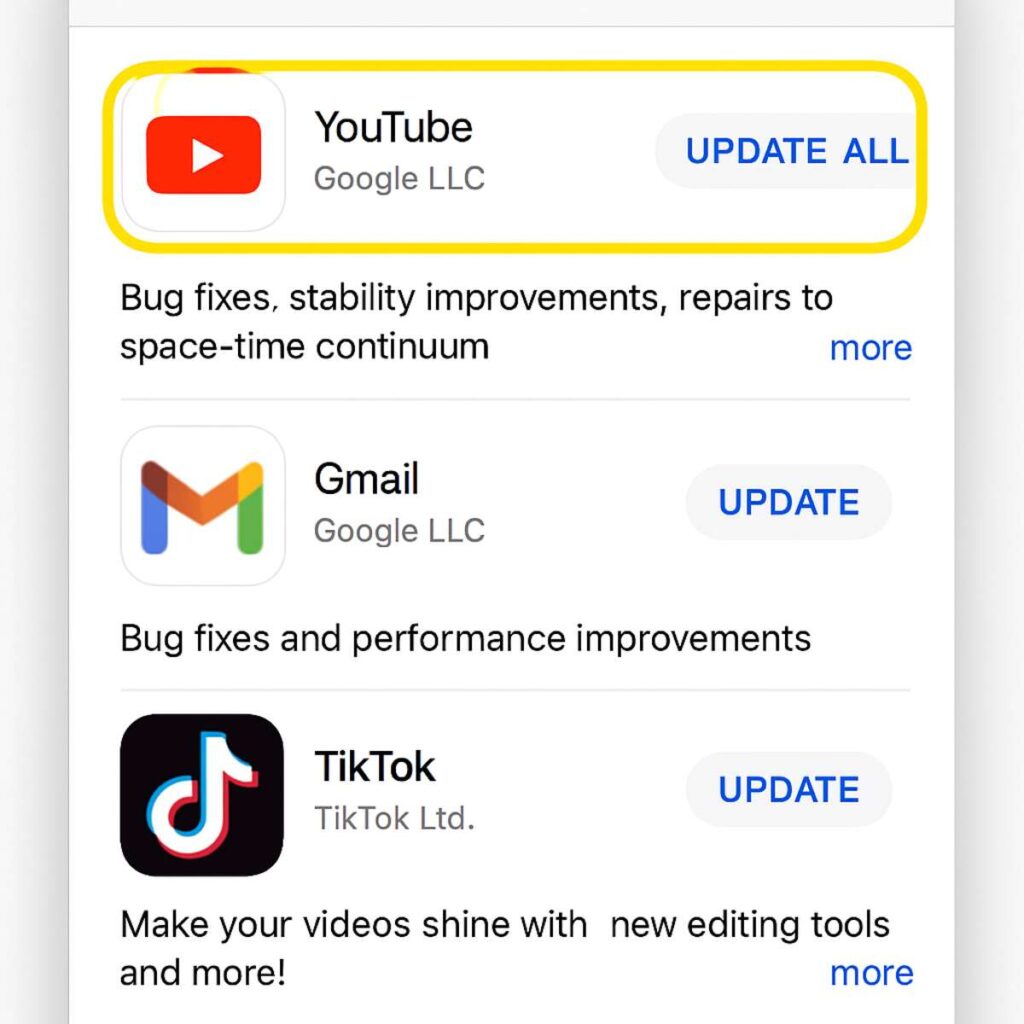
The Digital Grocery Store: Updating Apps Through the Mac App Store
We’ve all seen that little red notification bubble on the corner of the App Store icon. Think of this built-in application as a digital grocery store where you pick up the latest versions of your favorite tools, like Microsoft Word or a photo editor. This storefront only manages software you originally downloaded from its shelves; apps downloaded directly from websites (like Google Chrome or Zoom) usually handle their own updates internally. When you see those Mac App Store update notifications, it means developers have added new features or fixed bugs to keep your tools running smoothly. Since you are already signed in with your Apple ID, picking up these improvements is straightforward. Here is a quick checklist to manage the app updates mac users rely on for a secure and speedy machine:
- Click the App Store icon (the blue ‘A’) located in your Dock at the bottom of the screen.
- Look at the left sidebar and click Updates near the bottom.
- Review the list of available software improvements waiting to be installed on your computer.
- Click the Update All button at the top-right corner to save time and let the computer handle everything at once.
Instead of manually checking this list every week, you can instruct your computer to do the heavy lifting while you sleep. Turning on background downloads allows your Mac to automatically fetch and install these improvements whenever your computer is on and connected to the internet, but not actively being used. To set this up, simply open the App Store, click on “App Store” in the top menu bar next to the Apple logo, select “Settings,” and check the box next to “Automatic Updates.” This “set and forget” approach ensures you always wake up to a fresh machine with the latest Apple software update applied automatically to your favourite programs.
Keeping your everyday applications fresh takes care of the tools you use every day, but the operating system running beneath them eventually needs attention, too. While the App Store handles your digital groceries, a deeper tune-up requires a different built-in tool.
The Foundation Fix: Upgrading macOS via System Settings
Think of your Mac’s operating system (macOS) as the physical foundation of a house, where smaller “updates” and larger “upgrades” are necessary to keep everything standing strong. When Apple releases an update, it is like fixing a leaky faucet or replacing a lock; these are smaller patches designed to fix bugs and boost security within your current system. An upgrade, on the other hand, is a major home renovation that completely overhauls your software, bringing a brand-new name and design to your screen (like moving from the “Monterey” version to the “Sonoma” version). Knowing the difference helps you plan your day: small patches might take 15 minutes, while major renovations require a much longer coffee break while the computer restarts.
Your computer’s main control center is the starting point for the macOS update process, but it recently underwent a remodeling of its own. Older computers used a wide grid layout known as “System Preferences,” but modern machines have replaced it with Mac system settings, a cleaner menu that places all your settings in a vertical, scrollable list. To open this control center, click the recognizable Apple logo in the top-left corner of your screen and select the settings option from the drop-down menu. Once this window opens, you will notice a left-hand sidebar containing various tools to manage your machine safely.
Locating the exact menu for this task requires scanning the left sidebar for a few specific visual cues. Successfully upgrading macOS using system settings involves clicking through a logical sequence of symbols to reach the final download page. As you read down the left side of the window, look for these helpful icons:
- Wi-Fi (curved radio waves) to verify your computer is currently connected to the internet.
- General (a grey gear icon), which you must click to reveal your broader computer controls.
- Software Update (a circular gear with a curved arrow inside), which is located on the right side of the screen after clicking General.
Once your Mac finishes checking Apple’s servers, simply click the “Update Now” or “Upgrade Now” button on the screen and step away. The golden rule during this installation phase is absolute patience: you must never close your laptop lid, unplug the power cord, or force-restart the machine while it displays a black screen with a loading bar. Interrupting this delicate installation can confuse your computer’s software and cause it to stop working properly. While these built-in tools make digital renovations straightforward, it is always wise to prepare for the unexpected.
The Safety Net: Why You Must Use Time Machine Before Every Big Update
Have you ever felt a knot in your stomach when your computer screen stays black a little too long during a software update? While modern Apple updates are incredibly reliable, rare glitches or unexpected power outages can cause a digital hiccup during installation. Prioritizing mac data safety means creating a solid safety net before you ever click that “Upgrade Now” button, ensuring your family photos, tax documents, and important emails are never at risk.
Apple provides a brilliant, built-in tool called Time Machine to handle this exact worry. When you connect an external hard drive—a portable storage box that plugs into your computer with a cable—Time Machine takes “backup snapshots” of your entire system. Think of a backup snapshot as a freeze-frame of your Mac at a specific moment in time. If a major software renovation goes poorly, this external drive backup allows you to literally turn back the clock and restore your computer to the exact state it was in right before the update began.
Setting up this safety routine is very straightforward, transforming what could be a stressful process into a simple “plug and play” habit. To successfully backup mac with Time Machine before an update, you only need three things to guarantee success:
- An external hard drive with enough storage space to hold all your computer’s current files.
- The correct cable to physically connect that external drive to your Mac’s USB port.
- A quick trip to your System Settings (under “General” and then “Time Machine”) to select your plugged-in drive as your official backup location.
Once you establish this reliable safety net, you can confidently install any new software knowing your digital life is thoroughly protected. With your data completely secured on an outside drive, you no longer need to fear the update process, and you shouldn’t have to manually check for every tiny security patch either. Fortunately, your Mac is more than capable of handling those routine maintenance chores for you automatically while you sleep.
Hire a Personal Assistant: Scheduling Automatic macOS Updates
Imagine waking up to a freshly tuned-up computer without lifting a finger or sitting through a single loading screen. When you schedule automatic macOS updates, you are essentially hiring a digital personal assistant to handle routine maintenance while you are asleep or away from your desk. This hands-free approach ensures your Mac is always protected against the latest digital threats without requiring you to constantly click “Check for Updates” or worry about falling behind. Furthermore, letting your computer handle these tasks during off-hours prevents large downloads from slowing down your internet connection while you are trying to stream a movie or join a family video call.
Setting up this invisible helper is just as straightforward as checking your backup settings. First, click the Apple logo in the top-left corner of your screen, select “System Settings,” and click “General” in the left-hand sidebar. On the right side, click “Software Update.” You will see an option labeled “Automatic Updates” with a simple switch next to it. Clicking the little circled “i” (information) button next to this switch reveals a hidden menu where you can customize exactly what your Mac is allowed to do behind the scenes.
In this menu, you can fine-tune your automatic Mac updates so the computer only performs the tasks you are comfortable with. Instead of a rigid all-or-nothing system, macOS lets you separate the heavy lifting of downloading from the final step of installing, which is perfect for securely managing Mac background updates. For the best balance of safety and convenience, here are the recommended settings to toggle on:
- Check for updates: Let your Mac automatically look for new software.
- Download new updates when available: Saves time by silently fetching files in the background, though it waits for your permission to actually install major changes.
- Install macOS updates: Allows the computer to complete the installation overnight (provided your Mac is plugged in and powered on).
- Install application updates from the App Store to keep your everyday tools, like Safari and Pages, running smoothly.
With these switches flipped, your computer will reliably handle the heavy lifting on its own. However, Apple occasionally releases tiny, urgent fixes that do not require a full overnight restart.
Small but Mighty: Understanding Rapid Security Responses
While major macOS upgrades feel like a full home renovation, Apple sometimes needs to simply change the locks on your digital doors without rebuilding the entire house. These smaller, urgent fixes are known as Rapid Security Responses. Unlike standard software updates that can take thirty minutes or more to install, these tiny downloads are designed to protect your Mac immediately against newly discovered digital threats. Skipping these essential Mac security patches is like leaving a ground-floor window open after hearing about a neighbourhood burglar. Because they are so lightweight, your computer usually applies them in just a few minutes with a quick restart, ensuring you get the latest Apple security updates without heavily interrupting your workday or requiring major downtime.
Spotting one of these mini-updates is straightforward if you know exactly what to look for in your System Settings. Instead of changing the main version number of your operating system—like jumping from macOS 14.1 to 14.2—a Rapid Security Response simply adds a letter in parentheses to your current software version. For instance, after a quick installation, your Mac might display its version as macOS 14.1 (a), and subsequent fixes might use a (b) or (c). One of the greatest rapid security response benefits is that this lettering system lets you easily verify that your computer has applied the protective patch without needing to memorize complex technical codes. If you see that little letter, you can rest easy knowing the latest security gap has been successfully closed.
Occasionally, a swift security patch might accidentally break an app you use every day, but Apple provides a simple safety net to roll back the change. If a familiar program suddenly stops working right after a Rapid Security Response, you can easily remove the patch by returning to your System Settings, navigating to “General,” and clicking “About.” By clicking the tiny “i” information icon next to your macOS version, you will find a handy “Remove and Restart” button that rolls your system back to its state from yesterday. Once your core system is stable and secure, making sure your everyday third-party programs are equally up to date is the next logical step.
Updating the Outsiders: Managing Third-Party App Updates Without the App Store
While Apple’s built-in App Store is a fantastic digital grocery store for many tools, you probably use several essential programs downloaded directly from the internet. Software makers like Google, Zoom, and Microsoft often provide their applications straight from their own websites, creating what is known as “third-party” software. Because these outsider programs bypass Apple’s central storefront, they require a slightly different approach to keep them running smoothly and securely. Leaving these everyday tools outdated is like locking your front door while leaving your garage wide open; it creates hidden vulnerabilities in your system that digital intruders might exploit.
Fortunately, figuring out how to update Mac apps without involving the App Store is straightforward once you know exactly where to look. Most reputable third-party applications feature built-in “update checkers” that act like dedicated maintenance workers, periodically scanning the internet for newer, safer versions of themselves. Instead of visiting a central hub on your Mac, you trigger these protective updates directly from the application’s menu. To find these helpful tools, try looking in these common locations while your program is open and active on the screen:
- Click the application’s name in the top-left menu bar (right next to the Apple logo) and look for a “Check for Updates” button.
- Open the “Help” menu at the very top of your screen, where software makers frequently hide their update tools.
- Look for a dedicated “Settings” or “Preferences” gear icon nestled inside the main application window.
Web browsers demand special attention in this digital housekeeping routine because they serve as your primary vehicle for exploring the internet, encountering new security threats every single day. For instance, if you need to update Chrome on Mac, you will never find that option in your main Apple System Settings. Instead, Google Chrome alerts you with a small, color-coded word “Update” in the top-right corner of the browser window, which shifts from green to yellow to red as the security patch becomes more urgent. Successfully managing third-party app updates requires simply noticing these little visual clues across your favorite programs and clicking the prompt when it appears, which usually just restarts the software in a matter of seconds.
Getting into the habit of accepting these quick updates when prompted will keep your entire digital workspace safe, fast, and incredibly reliable. Centralizing this routine—spending just two minutes a week checking the menus of your most-used professional tools—prevents annoying crashes during your important video calls or typing sessions. However, before tackling larger system-wide renovations, you must free up enough disk space to unpack the new files.
Making Room: Clearing Disk Space for Large macOS Updates
Nothing is more frustrating than watching your computer restart, only to be trapped in an endless “Update Failed” loop because your hard drive is simply too full. When preparing for a major system renovation, you must account for “disk overhead,” which is the temporary extra room your computer needs to unpack and assemble the new software files. Think of it like buying flat-pack furniture; you need permanent floor space for the final bookshelf, but you also need temporary room to spread out the pieces and swing your hammer. A safe rule of thumb is to ensure you have at least 25 gigabytes of free space before starting a major upgrade, which prevents a Mac storage full update error from bringing your workday to a sudden halt.
Finding out exactly what is cluttering your computer is straightforward with Apple’s built-in storage manager. By clicking the Apple icon in the top-left corner, selecting “System Settings,” clicking “General,” and then choosing “Storage,” you will see a colorful bar chart showing exactly where your digital space went. When clearing disk space for Mac update preparation, everyday users usually discover their drive is filled by three common space hogs:
- Old Device Backups: Forgotten, massive files from old iPhones or iPads plugged into the computer years ago.
- The Downloads Folder: A digital junk drawer packed with old PDF menus, software installers, and email attachments you only needed once.
- The Trash Bin: Deleted files that remain on your drive, waiting to be permanently deleted.
While handling those obvious clutter zones is an easy way to free up space for macos, you might also notice a large grey section on your storage chart mysteriously labeled “System Data.” This category holds temporary processing files and background app data—essentially the digital dust your Mac naturally accumulates while running everyday tasks. You can safely shrink this section by simply restarting your Mac, which automatically clears many of these temporary files, or by manually clearing your web browser history. Even with a perfectly clean drive and plenty of room to spare, software renovations occasionally run into sudden hiccups, making it incredibly valuable to know what to do if a Mac update gets stuck.
Unsticking the Progress Bar: What to Do if a Mac Update Gets Stuck
Staring at a motionless black screen with a tiny, frozen white line is one of the most stressful parts of owning a computer. When it feels like a Mac update taking forever has completely stalled, your first instinct might be to panic. However, major system renovations require moving millions of tiny digital bricks behind the scenes, and the computer often pauses to quietly process them. Before assuming the machine is broken, give it at least two hours to finish its background chores.
Action becomes necessary if that timeline passes with zero visual progress. When you are certain your macbook stuck on the Apple logo update is genuinely frozen, you should follow a straightforward three-step rescue plan to get things moving again safely:
- Wait a bit longer: Leave the computer alone, plugged directly into wall power, for at least two full hours to ensure it isn’t just processing a massive file.
- Force a manual restart: Press and hold the physical power button on your keyboard until the screen goes completely black, wait ten seconds, and turn the machine back on.
- Start in Safe Mode: If the normal restart fails, boot the computer using a special startup method to bypass stubborn software roadblocks.
This special diagnostic environment, known as Safe Mode, is often the perfect way to fix Mac software update stuck loops. Think of Safe Mode as a stripped-down version of your computer that loads only the bare essentials, temporarily disabling background clutter that might be interfering with the installation. For older Macs with Intel chips, you access this by holding down the “Shift” key immediately after turning on the computer. For newer Macs with Apple chips, you simply press and hold the power button until an “Options” screen appears on a black background, then hold the “Shift” key while clicking your main hard drive icon. Once your familiar desktop appears, try clicking through the normal update process one more time.
Even the best troubleshooting steps have their limits, and you should never feel bad about asking for professional help. If you have tried manually restarting and using Safe Mode without any success, it is time to contact Apple Support so their technicians can safely reset the installation for you. On the other hand, if your system turns back on successfully but suddenly refuses to show you the latest macOS version you know was just released, you have encountered a completely different hurdle. Solving that particular headache requires investigating why your software might be missing.
The ‘Update Not Found’ Mystery: Troubleshooting Missing Software
Hearing about an exciting new macOS feature from a friend, only to open System Settings and see a “Your Mac is up to date” message, can be incredibly frustrating. When you are left wondering why your Mac is not finding updates, the issue usually boils down to a simple miscommunication. Your computer relies on a secure digital connection to Apple’s “update servers”—essentially a giant customer service desk in the cloud—to check whether new software is available. Before assuming your Mac software update is not working is a serious hardware failure, check these four common culprits:
- Hardware compatibility limits: Apple eventually stops offering major system overhauls to older computers because their internal parts cannot handle the newer, heavier software.
- Network glitches: A temporary hiccup in your Wi-Fi can prevent your Mac from connecting to Apple’s servers to check for new files.
- Incorrect date and time: If your computer’s internal clock does not exactly match global time servers, Apple’s security systems will automatically block the update connection.
- Lingering Beta profiles: If you ever signed up to test early “Beta” versions of macOS, your computer might be looking in the wrong digital aisle for its regular software.
Solving this mystery starts with ruling out the most permanent roadblock: compatibility cycles. Think of a major macOS upgrade like adding a heavy second story to a house; eventually, an older foundation simply cannot support the new weight safely. To check mac compatibility, click the Apple logo in the top-left corner, select “About This Mac,” and note the year your model was introduced. You can then compare that year against the official list of supported devices on Apple’s website to see if your computer has gracefully aged out of major renovations. If your Mac is definitely new enough but still stubbornly claims it is up to date, try restarting your Wi-Fi router or connecting to a completely different network to clear up temporary server blind spots.
Sometimes, the problem hides directly inside your system preferences. If you previously enrolled in Apple’s Beta Software Program—which grants VIP access to test unfinished software—your computer might be accidentally ignoring standard, everyday releases. To ensure this isn’t happening, open System Settings, click “General,” and select “Software Update” to see if a “Beta Updates” option is turned on. If it is, simply click the small “i” icon next to it and choose “Off.” Once you flip that switch and restore a standard connection to Apple’s servers, the correct software should instantly appear. Of course, the specific hardware inside your computer also dictates exactly how these files are installed once they finally download.
Silicon Secrets: Why M1, M2, and M3 Macs Update Differently
If you recently upgraded to a newer computer, you might have noticed that an M1 Mac update feels much faster than on older machines. This speed boost is a hidden perk of Apple’s modern “M-series” chips, formally known as Apple Silicon architecture. Instead of piecing together parts from various manufacturers, these newer chips integrate the processor, graphics, and memory into a single, highly efficient engine. Because everything lives under one roof, the computer processes the heavy lifting of a system upgrade incredibly quickly. You spend less time staring at a loading bar and more time actually using your Mac. These M2 Mac update benefits are often even more pronounced, turning what used to be a long chore into a quick coffee break.
Behind the scenes, these newer chips also change how the deepest layers of your computer receive their instructions through Apple Silicon firmware updates. Think of firmware as the subconscious reflexes of your Mac. It is the essential, invisible software built right into the physical hardware that tells the computer how to turn on, manage battery life, and connect to your screen. In the past, updating these “reflexes” was a separate, delicate process that occasionally required frustrating manual resets if things got confused. Now, Apple uses a unified update process. When you click to install a standard macOS update from System Settings, the Mac automatically bundles those deep hardware instructions in at the exact same time, seamlessly handling all the technical chores in the background.
Because of this all-in-one approach, modern Macs are remarkably stable and rarely require the complicated troubleshooting steps that older models sometimes demanded after a major upgrade. You can confidently rely on the standard update screen to keep both your apps and your hardware running beautifully without ever having to touch complex settings. However, there are still very rare situations where clicking that familiar “Update Now” button simply isn’t an option due to stubborn network blocks or unusual system errors. When standard menus completely fail, you must know how to bypass them entirely using built-in command tools.
For the Brave: Using the Terminal for Updates (Only When Necessary)
Occasionally, you might click the standard “Update Now” button only to watch your cursor turn into an endless spinning beachball. When your usual System Settings window completely freezes or glitches, you need a reliable “Plan B” to force the system to act. This is where the Command Line Interface (CLI)—a built-in tool that lets you talk directly to your computer using typed text instead of clicking graphical buttons—becomes incredibly useful. While staring at a blank text window can feel intimidating at first, utilising Mac Terminal updates simply gives you a direct, unfiltered connection to your computer’s brain to bypass any frozen menus.
To locate this digital emergency exit, open your Applications folder, find the “Utilities” folder, and double-click the app named “Terminal.” Once the plain text window opens, you only need to know two specific instructions to effectively update Mac software via terminal commands:
- To check what is available: Type softwareupdate -l and press Return. This utilises the core software update command Mac tool to list every available patch with 100% accuracy, cutting through any visual glitches occurring in your normal settings window.
- To install everything: Type sudo softwareupdate -i -a and press Return. This “sudo” (superuser do) command is a built-in security feature that gives the Mac temporary permission to make deep system changes. The computer will ask for your regular login password—which remains completely invisible on the screen as you type it—and then safely download and install all pending improvements.
Watching lines of text scroll by as the computer handles the heavy lifting might look like a scene from a hacker movie, but it is actually one of the safest ways to get a stubborn machine back on track. Your Mac will handle the rest of the process exactly as it normally would, eventually restarting to complete the job. However, if your machine refuses to find new software simply because it has aged out of Apple’s official upgrade cycle, you must transition to keeping your older, unsupported Mac running safely as a legacy device.
Legacy Life: Keeping Older, ‘Unsupported’ Macs Running Safely
Like any well-loved household appliance, your computer will eventually reach a point where the manufacturer no longer offers complete renovations. In the tech world, this stage is known as “End of Life” (EOL), transforming your once-modern machine into legacy hardware. When this happens, Apple stops providing the massive, yearly macOS upgrades that change how your screen looks or add brand-new applications. Instead of feeling left behind, it is helpful to view this as a comfortable transition phase where your focus simply shifts from acquiring shiny new features to maintaining a reliable, working tool.
Fortunately, reaching this milestone does not immediately render your laptop or desktop useless. Apple recognizes that everyday users need their existing computers to remain safe, offering a sturdy middle ground for old mac security through smaller, invisible software patches. These “Security Only” updates act exactly like routine lock changes on your front door; they will not remodel your house, but they successfully keep digital intruders out. You will find these vital adjustments in the exact same System Settings menu you already know, ensuring your system remains protected without overwhelming its aging internal components.
Temptation often arises when you see friends enjoying new software tools, leading some folks to consider forcing modern operating systems onto their aging machines. While technically possible, installing updates on unsupported macs requires specialized third-party software that drastically alters your computer’s foundation. Experts consistently warn everyday users about the risks of OpenCore legacy patchers, as tricking your older Mac into running heavy modern software is much like forcing a golf cart to run on jet fuel. You might successfully gain a few fun new features, but you heavily compromise the everyday stability and battery life you rely on to get work done.
Accepting your machine’s legacy status ultimately guarantees a much smoother, crash-free experience during its final years of service. By settling for essential security patches rather than fighting for unsupported visual upgrades, you preserve the natural lifespan of your hardware while keeping your personal data perfectly safe. Once you understand exactly what kind of software your specific model can comfortably handle, managing this ongoing upkeep without any stress is easy with a monthly maintenance checklist.
Your Updated Mac Action Plan: A Monthly Maintenance Checklist
Those lingering notification badges are no longer a source of stress, but a simple prompt for basic house maintenance. You now know exactly how to safely handle both everyday app improvements and structural system upgrades with total confidence.
To keep your digital foundation secure, build a quick, five-minute routine into your schedule. Following a reliable Mac maintenance checklist is the absolute easiest way to prevent glitches, block digital intruders, and keep your Mac fast for years to come.
Try this simple ‘First Sunday of the Month’ update checklist to start today:
- Check: Click the Apple logo in the top-left corner, select “About This Mac,” and view your current OS version.
- Secure: Open “System Settings,” click “General” in the sidebar, and approve any pending system upgrades.
- Refresh: Open the App Store, click “Updates” in the sidebar, and click “Update All” for your everyday tools.
Instead of avoiding those red pop-ups, you now have complete control over your computer’s health. Think of this new routine as your ultimate Mac update summary—a straightforward process that turns tedious digital chores into an effortless habit. Start right now by clicking that Apple icon, and enjoy the peace of mind that comes with a perfectly tuned machine.